Light or dark activated switch using Arduino
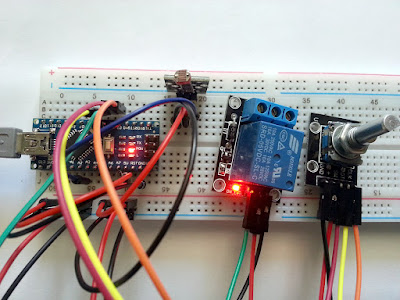
Using a microcontroller we can design a smarter device. One that does not activate the relay at every instant change of light (flash). The same device can turn from a dark activated relay into a light activated relay at a push of a button.
The following project uses an ATmega328 board with some modules which are part of a popular Arduino sensor kit. Don't worry if you don't have that modules. They are simple circuits for which I provided schematic.
Homemade PCB with toner transfer method
The toner transfer method is a cheap and easy way to make your own printed circuit boards (PCBs) at home. A laser printer is used to print the design on paper. Not all paper types are suitable for this kind of usage. The paper is placed with the printed side over the copper side of the circuit board and then the whole thing is heated. Most people use with good results a common iron, but if you have a laminator, use it instead of the iron. When heated, toner melts and sticks to the surfaces. The idea is to make it stick to the copper layer. After heating, the board is submerged in water and the paper should be easily peeled off from the copper side. A good transfer means no toner remains on the paper. Once this is done, the board can be etched using whatever method you want (ferric chloride for example).
This method is widespread among hobbyists because is cheap and easy. However, for some, the results are unsatisfactory and variable. I will share some of my experiences with this method.

Homemade PCB with silkscreen
Virtual Audio Cable in Linux Ubuntu
You probably need to do audio piping to record an audio output or to use SDR tools which only support audio input. You don't have to use a real cable to wire the sound card output into line in. The software approach is better. There is more than one way to do this in Linux. We'll look into Pulseaudio and ALSA, the sound servers used by Ubuntu. Depending on what application you use, you may need to configure the virtual connection on one or the other server.
PonyProg release 3.0 comes with modern UI
If you still have an older computer with a motherboard serial port, you may take into consideration building the serial adapter used by PonyProg, because it is easy to build and probably the cheapest programmer possible. The schematic of the interface can be found at the author's page (SI-Prog by Claudio Lanconelli).
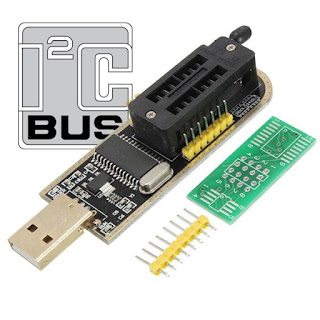
Currently, PonyProg only support SI-Prog or other serial based programmers and some parallel port programmers. With serial port, it communicates by bit-banging various protocols to the signaling lines contained in the RS232 interface (RTS, CTR and DTR). It would be nice if a future version would support the modern USB based programmers (like the CH341A MiniProgrammer) which lack a good software.
 |
| PonyProg 3.0 main window after reading an I2C EEPROM |
CH341A I2C Programming (Windows API)
CH341A is used by some cheap memory programmers. The IC is somehow limited in this configuration, because the programmer makes use only of the SPI and I2C interface. A popular device is the so-called "CH341A MiniProgrammer" that you can buy for 2 to 5 USD. And this is probably the cheapest device using CH341A.
If you got a "MiniProgrammer", you may want to use for more than memory chips programming. The device can actually be used as USB to I2C converter (not only I2C, but this article will focus only on I2C function). Let's see how to use the included library and header to communicate with I2C devices.


